Appliance Repair Help
Quality Factory Appliance Parts
Quality Appliance Service
:: Washer Parts
:: Dryer Parts
| Monthly Special |

:: GE Refrigerator Water Filter 2 Pack
:: MWF2 2 Pack
$69.95
Save 13%

__________
__________
----------------
__________
__________
----------------
| Quality Parts & Service |
:: Factory Authorized Parts
:: Same Day Shipping
:: Most Parts In Stock

:: Call Toll Free Today!

:: 1-866-745-2554
:: Same Day Service
:: 90 Day Labor Guarantee
:: Free Online Repair Help
:: Over 15 years Experience
:: Professional & Courteous
| Testimonials |
Thank you for the way you handled my
microwave repair. I can see you are in
look past the short term. I will not hesitate
to refer you to my friends and family.
microwave repair. I can see you are in
look past the short term. I will not hesitate
to refer you to my friends and family.
certainly recommend the quality and
helpfulness of your work and the integrity
of the way you do it, every chance we get.
Katie O.
helpfulness of your work and the integrity
of the way you do it, every chance we get.
Katie O.
More
| Monthly Tip |
Cleaning out the lint build up inside your
dryer is very important. The accumulation
of lint can catch fire and spread to your
home. The lint will also act as insulation
on your motor and cause premature
failure. All dryers and there vents should
be cleaned at least once a year. Doing
this will keep your family safe and your
dryer operating.
If your dryer runs but doesn't heat then it could possibly be an open(Bad)
igniter. Another possible cause could be an open (again-bad) thermal fuse.
Here is how to check your igniter.
Unplug the electric from the dryer.
First verify that the front panel is all one panel or two panels. If it is two
panels then you will have to start by removing the bottom panel. This can
be accomplished by pulling on the sides of both panels until it flips down or
inserting a putty knife into the top of the lower panel on both sides to
release the retaining clips. If your dryer is the type with the top retaining
clips then be careful not to pull on the sides as this will damage the top
retaining clips.
*Note* If your dryer has the lower access panel, removing the front panel is
unnecessary. The igniter will be accessible already.
If your dryer is all one panel, continue by raising the top of the dryer.
Raising the top can be accomplished by removing the 2 screws under the
lint filter. After the screws are removed grasp the top on the sides with both
hands and pull forward and up. The top will then hinge to the back.
Remove the 2 screws at the top of the upper panel.. Remove the wire
harness or terminal leads to the door switch to free front panel from dryer.
Be careful to properly mark the wires so you install them correctly when
reassembling.
Lower Panel Folks Continue Here> Now that the igniter is accessible, locate
the igniter in burner assembly. Remove harness connector for igniter and
use an ohm meter to check for continuity. If the igniter has not continuity,
replace it. If it has continuity then search for another cause of no heat.
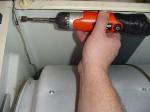
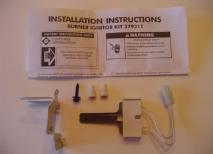
To remove the igniter, loosen the 5/16" bolt securing it to the burner with a
box end wrench, and replace with a new one. A small crack in igniter can
usually be seen at this time. Take care when installing your new igniter as
they break very easily.
On some models the burner tube will have to be removed to replace the
igniter. These tubes are screwed to the valve plate by 2 screws. But in
most cases you can replace the igniter without that step.
Reinstall dryer and plug in. Check for heat.
and electrical parts that can cause serious injury and death. If you aren't familiar with these types of
| Did this site save you an expensive service call? Please show thanks and...... |
- Dryer Igniter
La Porte
Michigan City
Michigan City
South Bend
Toll Free
Toll Free
219.369.9947
219.879.7858
574.289.5263
866.745.2554
Lane Appliance


